Located where the Mojave and Colorado deserts meet, Joshua Tree National Park offers a stark and otherworldly landscape perfect for backcountry exploration. Known for its twisted Joshua trees, massive granite boulders, and star-filled skies, the park has become a favorite destination for outdoor enthusiasts seeking a rugged and peaceful backpacking experience. With wide open spaces, minimal light pollution, and relatively low permit traffic, Joshua Tree is especially appealing to budget travelers, solo hikers, and nature lovers looking for solitude without straying too far from urban centers.
This guide is tailored to help you plan a successful and affordable backpacking trip through the park. You’ll learn about the best seasons to visit, how to get there cheaply, suggested routes, essential gear, and tips for navigating this unique desert landscape safely and responsibly. Whether you’re embarking on a quick overnight or planning a multi-day adventure, this resource will walk you through the essentials.
Why Backpacking in Joshua Tree National Park Is Worth It
Backpacking in Joshua Tree offers more than just desert views—it provides an immersion into two intersecting desert ecosystems, each with its own flora, fauna, and topography. The Mojave Desert dominates the western part of the park with its iconic Joshua trees, boulder fields, and higher elevation. Meanwhile, the Colorado Desert region in the south is lower, hotter, and home to creosote bushes, cholla cactus gardens, and ocotillo. This contrast allows backpackers to experience two distinct environments in a single trip.
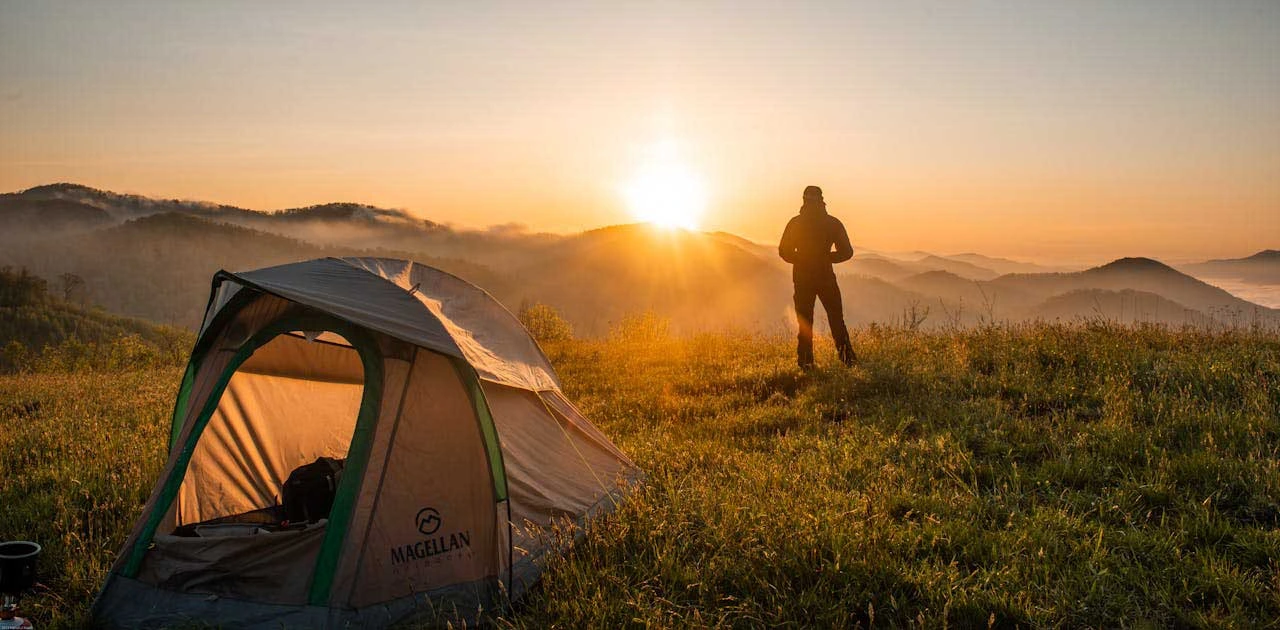
What makes Joshua Tree especially compelling for backpackers is the sense of seclusion it offers. Many designated backcountry sites are far from roads and campgrounds, so it’s not unusual to spend an entire night without seeing another soul. In addition, the vast, exposed terrain creates stunning sunrises, colorful sunsets, and some of the clearest stargazing in the Lower 48.
Moreover, backpacking here doesn’t require complicated logistics. Permits are free and easy to obtain, trails are less crowded compared to alpine parks, and the weather during the right seasons is ideal for minimalist travel. For those who enjoy dry climates, wide-open skies, and geological oddities, Joshua Tree delivers a truly unique experience.
Best Time to Go Backpacking in Joshua Tree National Park
Timing is everything in a desert environment like Joshua Tree. Because of its extreme heat in summer and surprisingly cold winter nights, backpackers need to plan their trips around seasonal conditions.
Spring (March to early May)
Spring is the best season for backpacking in Joshua Tree. Daytime temperatures typically range from 70°F to 85°F, while nights remain cool but manageable. This is also the season when desert wildflowers bloom, especially after wet winters, adding bursts of color to the muted landscape. However, it’s also the most popular time to visit, so plan to arrive early for parking and campsite access.
Fall (October to early November)
Another excellent window, fall brings mild daytime temperatures and cooler nights. The crowds are lighter than in spring, and trail conditions are stable. Backpacking in late October can offer ideal conditions if you’re prepared for colder evenings.
Winter (Late November to February)
While daytime temperatures can be pleasant (50s to low 60s), winter nights often dip below freezing, especially in the higher elevation Mojave zones. Wind chill and rainstorms are possible, and snow is rare but not unheard of. That said, experienced winter backpackers with the right gear can enjoy nearly empty trails and striking views.
Summer (Late May to September)
Avoid summer backpacking unless you’re extremely experienced in desert travel. Temperatures can exceed 100°F in both desert zones, with minimal shade and no reliable water sources. Heatstroke is a real danger. Instead, focus on short sunrise hikes or nighttime car camping if visiting in summer.
For budget travelers, fall and early spring offer a sweet spot with favorable weather and lower surrounding lodging prices, especially during weekdays.
How to Get There (and Around on a Budget)
Joshua Tree National Park is conveniently located in Southern California, within a few hours’ drive of several major cities. The park has three main entrances: West Entrance (Joshua Tree Village), North Entrance (Twentynine Palms), and South Entrance (near I-10 at Cottonwood Springs).
From Los Angeles (140 miles / ~2.5–3 hours)
- Driving: The most direct and flexible option. Take I-10 east and exit at Joshua Tree or Twentynine Palms, depending on your trailhead.
- Budget Tip: Carpool with friends or use apps like BlaBlaCar or local Facebook backpacking groups to split fuel costs.
From San Diego (175 miles / ~3–3.5 hours)
- Driving: Take I-15 North to I-215, then connect with I-10 East.
- Public Transit Option: Take an Amtrak or Greyhound to Palm Springs, then use a rideshare or taxi to reach the park (about 45–60 minutes from Palm Springs).
From Las Vegas (190 miles / ~3–4 hours)
- Drive south on I-15, connect to I-40 and CA-62 to reach the north side of the park.
- This route is scenic and less congested than the LA corridor.
Using Public Transit
While no public buses go directly into the park, you can get close:
- Greyhound or FlixBus to Palm Springs or Yucca Valley
- Uber/Lyft or local cab from there to your trailhead (usually $40–$60 one-way)
Once inside the park, there is no shuttle system, so you’ll need to arrange a vehicle drop-off or pickup for point-to-point hikes. Some visitors bring bicycles to travel between trailheads, although this requires additional planning due to heat and elevation gain.
Budget-friendly note: Entrance to the park is $30 per vehicle for a 7-day pass. Solo travelers can save by using the $15 per person walk-in fee or purchasing an America the Beautiful annual pass ($80), which covers all U.S. national parks for one year.
Suggested Backpacking Itineraries
Joshua Tree offers a range of backpacking itineraries for different skill levels and time frames. The terrain is open and rugged, so trips are often customizable, but the following examples provide a strong starting point.
3-Day Intro Trip: Boy Scout Trail Out-and-Back
- Trailhead: Either from Indian Cove or the southern Boy Scout Trailhead (near Park Boulevard)
- Distance: 16–18 miles round trip
- Highlights: Classic Joshua tree forests, granite formations, wide desert views
This is a popular overnight or short multi-day route that’s relatively flat and beginner-friendly. Hikers can camp in designated backcountry zones along the way. Just be sure to pack in all your water, as there are no natural sources on this trail.
5-Day Moderate Trip: Black Rock to Covington Flats Loop
- Trailhead: Black Rock Canyon
- Distance: ~30 miles
- Highlights: Yucca woodlands, ridgelines, open valleys, and fewer crowds
This loop combines portions of the California Riding and Hiking Trail with lesser-used connector trails near Covington Flats. It’s an excellent intermediate trip with plenty of solitude and varied terrain. Water caching is strongly recommended due to the lack of water sources.
7-Day Long Trek: California Riding and Hiking Trail (CRHT)
- Trailhead: Black Rock Canyon to North Entrance (or reverse)
- Distance: ~37 miles one-way
- Highlights: Full desert immersion, sunrise views, wilderness solitude
This one-way route traverses the park from west to east. It’s ideal for seasoned backpackers looking to explore Joshua Tree’s vast interior over several days. There are designated backcountry zones along the way, and a vehicle shuttle or pickup is needed at the end. Because water is not available on the trail, plan carefully to cache water in advance at key access points (such as Covington Flat Road or Geology Tour Road).
Budget Accommodation Options
If you’re extending your stay or want a mix of camping and backpacking, Joshua Tree offers several affordable lodging options both inside and near the park.
Backcountry Camping (Free with Permit)
- Cost: Free
- Booking: Self-register at any of the 13 backcountry boards at trailheads
- Rules: Camp at least 1 mile from the road and 500 feet from trails and water sources
Backcountry camping is budget-friendly and accessible. You don’t need to reserve in advance, but you must fill out a permit at a backcountry registration board and carry the permit copy with you.
Developed Campgrounds (Advance Booking Recommended)
- Popular Sites: Hidden Valley, Jumbo Rocks, Indian Cove, Black Rock
- Cost: $20–$25 per night
- Booking: Recreation.gov
These campgrounds offer vault toilets, picnic tables, and fire rings but no water. Book well in advance for spring and fall, especially on weekends.
Budget Motels and Lodges (Outside the Park)
- Locations: Joshua Tree Village, Yucca Valley, Twentynine Palms
- Rates: $60–$100 per night (off-season deals available)
Nearby towns provide low-cost motels, hostels, and even Airbnb rentals. This is a good option for pre- or post-hike recovery or when weather disrupts your backcountry plans.
Backpacking Costs in Joshua Tree National Park
Compared to many national parks, Joshua Tree is relatively affordable for backpackers. Here’s a breakdown of common costs:
| Item | Estimated Cost |
|---|---|
| Entrance Fee (per person) | $15 (or $30 per vehicle) |
| Backcountry Permit | Free |
| Campground (per night) | $20–$25 |
| Gear Rental (backpack, stove) | $50–$100 (3-day rental) |
| Food (3-day trip) | $30–$50 |
| Water (if buying gallon jugs) | ~$1 per gallon (plan 1 gal/day) |
Money-Saving Tips:
- Visit during weekdays or shoulder seasons for lower lodging rates.
- Buy an America the Beautiful Pass if visiting multiple parks.
- Share transportation and lodging with friends to reduce per-person costs.
- Cache water instead of carrying gallons on your back.
Must-Pack Essentials for Joshua Tree National Park
The desert environment demands lightweight but effective gear that protects you from sun, wind, and cold nighttime temps. Here’s a basic backpacking checklist for Joshua Tree:
- Tent or ultralight shelter – low-profile, wind-resistant models work best
- Sleeping bag (20°F–30°F rating) – nights can be surprisingly cold
- Sleeping pad – insulates against rocky ground
- Water containers (4–6 liters capacity minimum) – hydration is critical
- Stove and fuel – fire bans are common, so don’t rely on campfires
- Food – high-calorie, lightweight meals (freeze-dried, trail mix, energy bars)
- Water filter or purification tablets – only needed if you’re caching or using emergency sources
- Navigation tools – map, compass, or GPS app (Gaia GPS, Avenza Maps)
- Sun protection – sunglasses, sunscreen, brimmed hat, and UPF clothing
- Layered clothing – base layers, fleece or down jacket, and windbreaker
- Bear bag or odor-proof storage – required for proper food storage (even though bear encounters are rare)
- Headlamp with extra batteries – for pre-dawn hikes or emergencies
- First aid kit and repair kit – include blister care, bandages, duct tape, etc.
If you plan to use affiliate links, recommended gear includes ultralight tents, water filters, camp stoves, multi-day backpacks, and portable solar chargers.
Top Things to Do for Backpackers
Even short backpacking routes in Joshua Tree pack in big scenery and adventure. Here are a few highlights to seek out:
- Keys View: Panoramic views of the Coachella Valley and San Andreas Fault, great for sunset
- Arch Rock: A popular photo stop on the way to backcountry sites like Pinto Basin
- Lost Horse Mine: A historic gold mine accessible via a scenic loop
- Cactus gardens: Especially beautiful during spring bloom in the Cholla Cactus Garden
- Barker Dam Trail: Excellent for spotting bighorn sheep and birds
- Jumbo Rocks & Skull Rock: Great areas to scramble and relax during rest days
Although there are no tidepools or coastal zones, the unique desert formations—like towering boulders and surreal Joshua trees—offer equally dramatic photo ops.
Food and Water Tips for Backpackers
Water is the biggest logistical challenge for Joshua Tree backpackers. Natural water sources are extremely rare and not reliable. Therefore, you must:
- Cache water at strategic points before your trip (allowed on dirt roads and near trailheads)
- Carry 4–6 liters per day, depending on the temperature and intensity
- Label water caches clearly with your name and date to comply with park rules
All cached or collected water should be filtered or treated, especially if using emergency sources like puddles after rain.
For food:
- Pack high-calorie, lightweight meals that don’t require refrigeration
- A simple canister stove or alcohol stove is perfect for boiling water
- Bring trail snacks like jerky, granola, dried fruit, and nut butter
- Pack out all food waste, even biodegradable scraps
Because of the dry air, appetite loss is common—so pack foods you enjoy and remember to eat and drink regularly even if you don’t feel thirsty.
Safety Tips for Backpacking in Joshua Tree National Park
Backpacking in the desert requires special attention to safety, especially due to the region’s extreme conditions and lack of natural water sources. The biggest hazards are heat, dehydration, and disorientation. Trails may not always be well-marked, so always carry a map or GPS, and know your route ahead of time.
Weather in Joshua Tree can shift quickly. Daytime heat in spring and fall may still reach the high 80s, while nighttime temperatures can plummet below freezing in winter. Avoid hiking in midday heat, especially in summer. Start early, rest during peak sun hours, and always carry more water than you think you’ll need.
Though bear encounters are rare, food storage rules still apply. Use a bear bag or odor-proof sack to keep animals like coyotes or rodents away from your supplies. Ticks and rattlesnakes also inhabit the park. Stay on-trail when possible, check your clothes and gear daily, and avoid tall grass or rock crevices without scanning them first.
For emergencies, cell service is unreliable in most parts of the park. Carry a personal locator beacon (PLB) or GPS device with SOS capability if venturing deep into the backcountry. Leave your itinerary with someone and sign in at a backcountry board before heading out.
Eco-Friendly and Responsible Travel Tips
Joshua Tree is a fragile desert environment, and its slow-growing plants and dry soils are easily damaged. Practicing Leave No Trace principles is critical here. That includes:
- Camping on durable surfaces, like sand or gravel
- Avoiding cryptobiotic crusts, which help prevent erosion and support plant life
- Packing out all trash, including used toilet paper and food scraps
- Using a wag bag or digging catholes at least 6 inches deep and 200 feet away from trails and campsites
Backpackers must also store food securely to keep animals wild and ecosystems healthy. Use bear-proof bags or canisters when possible, and never leave food unattended.
Plastic waste is another issue. Bring a reusable water container, avoid single-use plastics, and consolidate packaging before your trip. If you cache water, be sure to remove all containers after your hike to avoid littering.
Recommended Apps & Tools for Backpackers
Digital tools can greatly improve your safety and experience in Joshua Tree—especially since cell service is limited in most areas.
- Gaia GPS – Ideal for offline maps, custom trail planning, and elevation profiles
- AllTrails Pro – Offers downloadable trail maps and user reviews
- Avenza Maps – Lets you upload and use USGS topographic maps offline
- NPS App – For alerts, maps, park regulations, and visitor center info
- onX Backcountry – Excellent for route planning and terrain analysis
In addition, use Recreation.gov to reserve campsites and find permit details. If you need weather forecasts, Windy and NOAA Weather Radar provide highly accurate updates even for remote zones. All of these apps can be paired with affiliate links when recommending gear or digital services.
Frequently Asked Questions
Yes, you can cache water, but it must be done responsibly. Clearly label your water containers with your name and expected pickup date, and always retrieve them after your trip. Cache only near designated dirt roads, trailheads, or marked areas to avoid damaging vegetation.
Nights in Joshua Tree can get surprisingly cold, especially in fall and winter. Temperatures can drop into the 30s°F or lower, even if daytime highs reach the 70s or 80s. Always bring a warm sleeping bag (20–30°F rating) and extra layers for nighttime comfort.
No. Campfires are strictly prohibited in the backcountry due to high wildfire risk. You must use a portable stove for cooking. Even in designated campgrounds, fire restrictions are common during dry periods.
Yes, but it’s free and easy to obtain. You must fill out a self-registration permit at any of the park’s backcountry registration boards before you start your hike. Keep the top copy with you and drop the second copy in the box.
Wildlife sightings often happen during early morning or near dusk. Look for bighorn sheep, jackrabbits, and kangaroo rats around rocky outcrops and dry washes. Birdwatchers may also spot hawks, owls, and roadrunners. Always observe animals from a distance and never feed them.
No, bears are not native to Joshua Tree. However, small animals like rodents and coyotes can still be a problem if food is not stored properly. Use an odor-proof sack or bear bag and hang it at least 10 feet above the ground and 4 feet from a branch.
Desert hiking requires more hydration than you may expect. Plan to carry at least 1 gallon (4 liters) per person per day—more if temperatures are high or your route is strenuous. Never rely on natural water sources in the park, as they are extremely scarce and unreliable.
Technically yes, but it’s discouraged unless you’re experienced with navigation and desert travel. Going off-trail can damage fragile plants and cryptobiotic crusts. Stick to established trails and durable surfaces whenever possible.
No, pets are not allowed on backcountry trails, even on a leash. They are restricted to campgrounds and paved roads. The harsh terrain and lack of water also make the park unsuitable for dogs on multi-day trips.
The Boy Scout Trail, Lost Horse Mine Loop, or areas near Black Rock Canyon are excellent for beginners. These trails offer relatively easy navigation, good scenery, and access to backcountry zones without requiring complex logistics.
Robert Starke is a graphic designer with a keen eye for detail and a strong background in video editing. Beyond his creative work, he’s an avid traveler and passionate writer who enjoys sharing practical, engaging advice with fellow adventurers. A lifelong animal lover, Robert also writes about pet products for other websites. Here at Traveleon.com, he focuses mainly on camping, hiking, and backpacking—offering firsthand tips, gear guides, and destination insights to help readers make the most of their time outdoors.